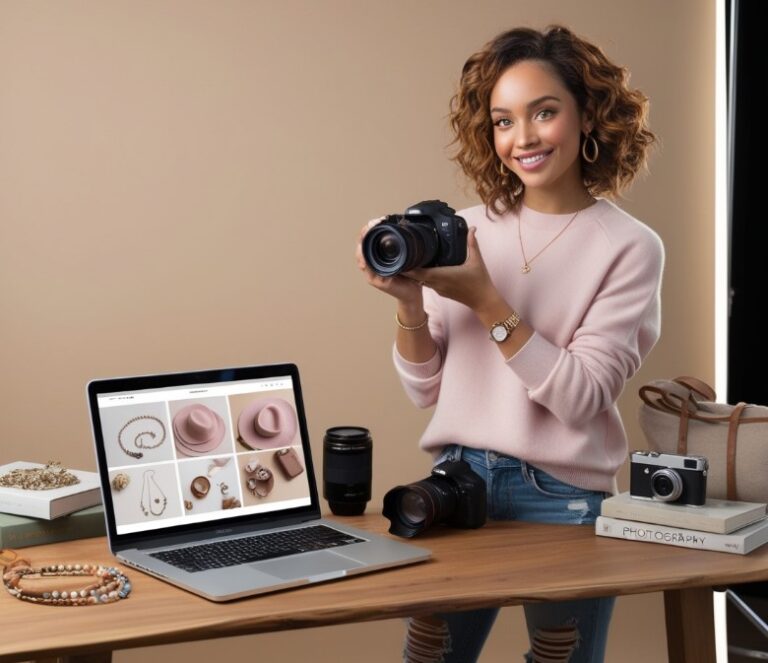
In the digital age, visual content is king, especially in the realm of eCommerce where your product images often serve as the first, and sometimes only, interaction customers have with your products. Therefore, the quality of these images can significantly influence consumer behavior and sales.
For many small business owners, professional photography might seem out of reach due to budget constraints. However, you can still achieve exceptional results through do-it-yourself photography with some creativity and the right tools. Let’s explore how you can enhance your online store’s appeal with DIY photography techniques that won’t drain your wallet.
Selecting the Right Camera

While professional photographers may boast an array of expensive equipment, the truth is that you don’t need the most high-end camera to take great product photos. The market is teeming with affordable options that offer high-resolution images and user-friendly features. Entry-level DSLR cameras, certain compact cameras, and even newer smartphones with advanced camera settings provide excellent image quality suitable for online product photography.
If your budget is particularly tight, consider buying a refurbished camera or exploring second-hand options. These can often provide the best value for money without compromising on the essential features you need to capture sharp, detailed images of your products.
Mastering DIY Lighting Techniques
Lighting can make or break your product photography. Good lighting highlights the best features of your products, reduces unflattering shadows, and can even convey a mood or atmosphere. Instead of investing in expensive studio lights, you can create effective lighting solutions at home. Window light is a wonderful, natural source of light that is soft and evenly diffused. Set up your shooting area near a large window to take advantage of daylight, and use white boards or reflectors to bounce light back onto your products, eliminating harsh shadows.
For more consistent lighting, regardless of the time of day or weather conditions, consider DIY softbox solutions. You can make your own softbox with materials like white fabric, cardboard, and some simple household lamps. This setup will mimic the soft, diffusive light of professional softbox lighting, ensuring your products are always seen in the best light.
Using a Tripod for Sharp Images
Sharpness and clarity are crucial for product images. A steady camera is essential to avoid blurriness, especially in lower light conditions where longer exposure times are needed. A tripod is a worthwhile investment here, and it doesn’t have to be expensive. A basic tripod provides the stability you need and can also help keep your camera angle consistent across different shots. This is particularly useful when you need to photograph multiple items under the same conditions.
Crafting the Perfect Backdrop

The background of your product images should be simple and focus attention on the product itself. You can create a professional-looking backdrop with just a few materials. White or neutral-colored paper rolls are an excellent choice for a seamless look.
Alternatively, fabric draped smoothly can also serve as an effective backdrop. If you want to get creative, you can use different colors or textures to complement the product and enhance the overall aesthetic of your images without distracting from the main focus.
Accessorizing Your Photography Setup
Small accessories can make a big difference in the outcome of your photos. Consider using props that align with your brand to create a story around your products. Reflectors, which can be as simple as a piece of white cardboard, help manage shadows and highlights. Clamps and stands can hold products in place or secure backdrops, making your shooting process smoother and more professional.
By utilizing these DIY photography tips and techniques, you can significantly enhance the visual appeal of your online store. High-quality product images not only attract customers but also provide a boost in credibility and professionalism, all while keeping costs low. Remember, the goal is to showcase your products in the best possible light, literally and figuratively, and with a little effort, you can achieve just that from the comfort of your home or office.
Harnessing the Power of Editing Software
Photo editing is crucial in transforming good photographs into great ones, enhancing details, correcting colors, and ensuring consistency across your product lineup. While professional software like Adobe Photoshop is highly effective, it can be pricey for a small business. Fortunately, there are budget-friendly alternatives that still offer a wide range of editing capabilities. Applications like ProductScope and GIMP are free and provide tools that can handle most basic editing needs, including color correction, cropping, and even some advanced manipulations like background removal.
Additionally, online platforms like Canva also offer photo editing capabilities, along with templates and design elements that can be useful for creating promotional graphics or social media posts. Spending some time learning these tools can significantly elevate the quality of your product images and the overall aesthetic of your online store.
Streamlining Your Setup
Efficiency in your photography process can save you both time and money. Setting up a dedicated space for photography within your workspace is ideal. This doesn’t need to be large—a small corner with good lighting can often suffice. Keep your setup simple and easy to assemble. This means having a go-to backdrop that you can easily mount and remove, keeping your tripod at hand, and storing your lights in an accessible place. The quicker it is to set up and break down your photography station, the more inclined you will be to consistently create quality content.
Continuous Learning and Experimentation
Photography is as much an art as it is a technical skill, and there is always room for improvement. Invest time in learning about photography basics such as lighting, composition, and camera settings. Plenty of free resources are available online, including tutorials, blogs, and video courses that can teach you new techniques and improve your skills over time.